
Website Editor: Creating & Organizing Pages
title: Website Editor: Creating & Organizing Pages bookstack_book: Getting Started description: Add new pages to your site, nest them under a parent page, set a share image, reorder your page list, and manage a page's content with the keyboard alone.
Overview
Every page on your public site is managed from the Website Pages list in your admin sidebar. From there you can add new pages, set how they nest under one another, control what shows when a page is shared on social media, and change the order pages appear in your site's navigation.
Step 1: Create a new page
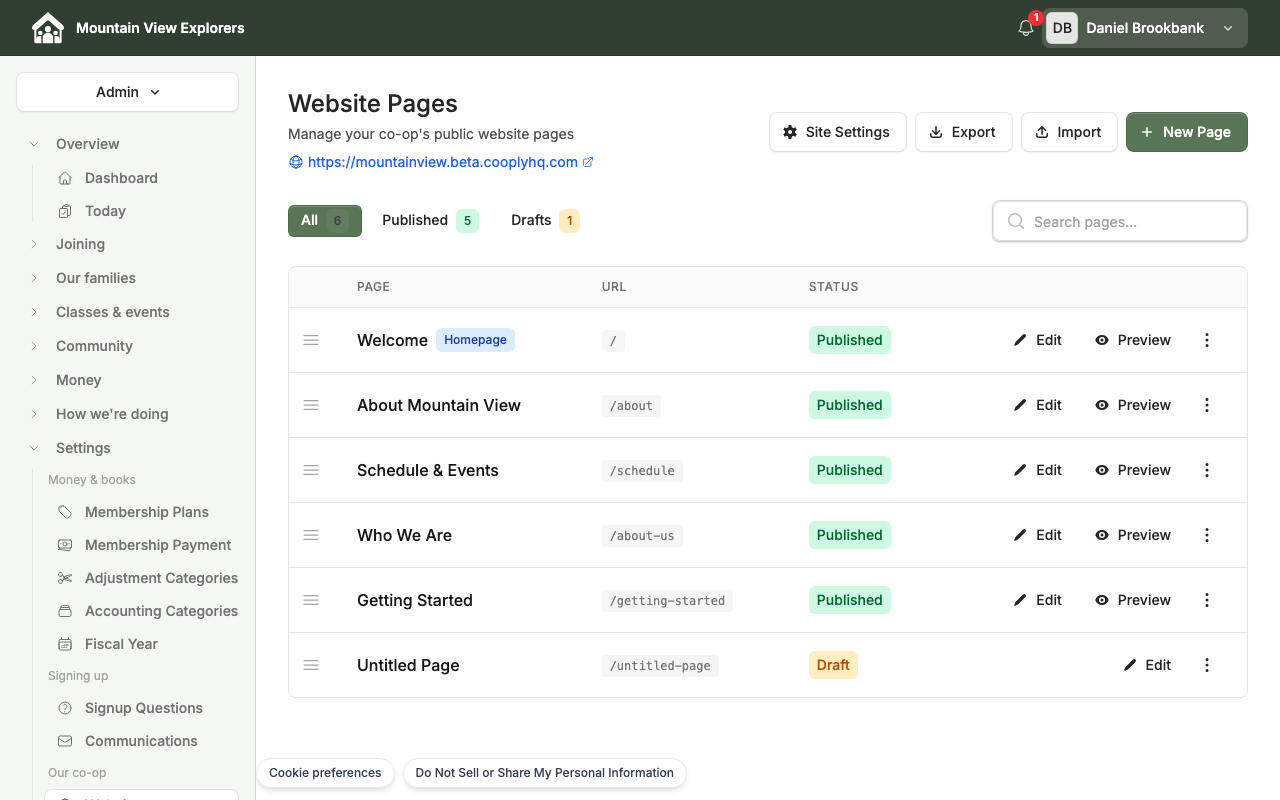
Your new page opens directly in the canvas editor, ready to edit. It's created as an unpublished draft and left out of your site's menu until you choose to show it — nothing changes on your live site until you publish.
Step 2: Set a page's parent page
Pages can nest under one another — for example, an "Our Programs" page could hold "Elementary" and "Middle School" as subpages.
- With the page open in the canvas editor, click More, then Page settings.
- Under Parent page, choose the page this one should nest under, or leave it set to None (top-level).
- Click Save draft.
A subpage appears in a dropdown under its parent in your site's navigation, and lives at a web address like /parent-slug/page-slug.
A few things to know:
- Your site's homepage can't have a parent — there's no Parent page option for it.
- Once a page is published, its parent can't be changed, because that would change the page's web address. Set the parent before you publish for the first time.
- A page that already has subpages of its own must stay top-level; it can't be made a subpage of something else.
Step 3: Set a page's share image
- With the page open in the canvas editor, click More, then Page settings.
- Under Share image, click to upload a photo.
- Click Save draft.
Only image files are accepted here — uploading anything else shows an error and the upload doesn't go through.
Step 4: Reorder pages in your page list
On the Website Pages list, grab the handle next to a page and move it up or down to change where it falls in your site's navigation. Your public menu updates to match as soon as the new order is saved.
Step 5: Manage a page's content with the keyboard alone
Building out a page's content doesn't require a mouse:
- Tab to reach a section's action bar — Settings, move up, move down, Duplicate, Hide, and Del are all operable by keyboard.
- Add a section from the + palette; your typing cursor lands right inside the new section.
- Use the move up / move down controls to reorder a section.
- Use Del to remove a section.
- Reach Publish the same way, through the toolbar or the More menu.
A page can be built, reorganized, and published start to finish without touching a mouse or trackpad.
Next steps
Now that you know how to create and organize pages, see Website Editor: Editing Content & Publishing to learn how to edit a page's content and publish your changes.