How to Create an Event and Enable Member Registration
Overview
Events let you schedule activities — classes, field trips, co-op days — and give members a way to register directly through your site. This guide walks you through creating an event, configuring registration and pricing, publishing it, and what your members see when they sign up.
Before you start: Your co-op site must be active and your membership plans set up. If you are collecting payment for events, your Stripe account must be connected under Payouts & Billing.
Step 1: Navigate to Events
- Sign in to your co-op admin panel.
- In the left sidebar, click Events.
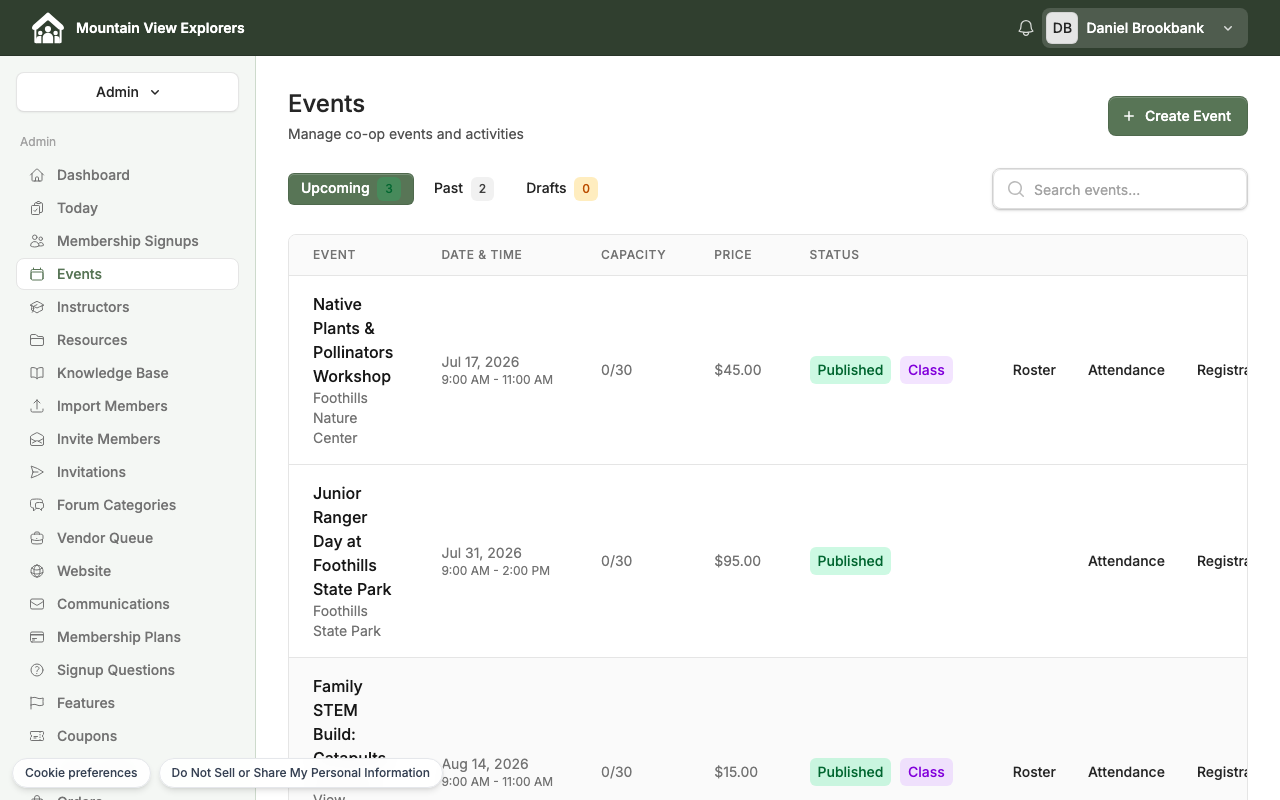
The Events page lists all your scheduled events. If you have not created any yet, you will see an empty state with a New Event button.
Step 2: Create a New Event
- Click New Event (top-right corner, or the button in the empty state).
The event creation form opens.
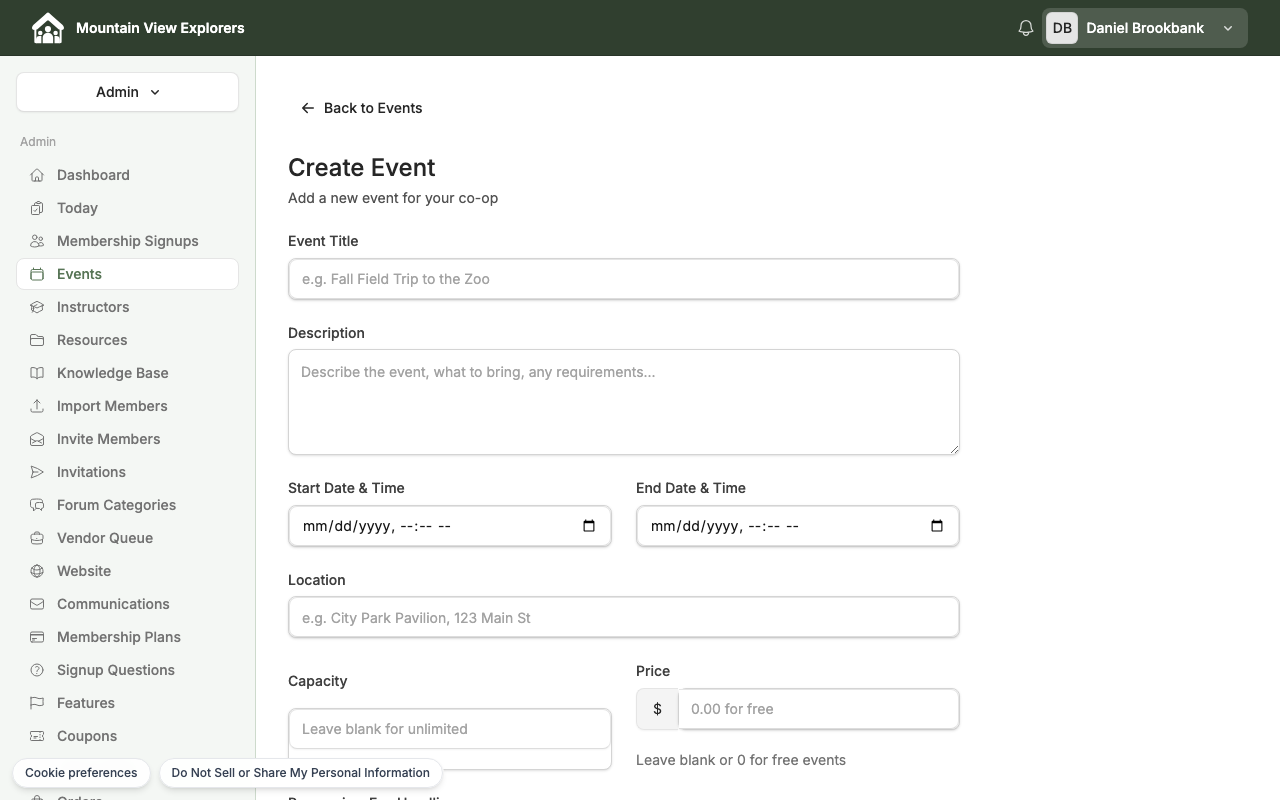
- Fill in the event details:
| Field | What to enter |
|---|---|
| Title | A clear, recognizable name (e.g., "Spring Co-op Day", "Math Class — Week 12") |
| Date | The date the event takes place |
| Start Time / End Time | When the event begins and ends |
| Location | Physical address, room name, or "Online" for virtual events |
| Description | Details families need to know — what to bring, parking, etc. |
Step 3: Configure Registration Settings
In the same form, scroll to the Registration section.
| Setting | What it does |
|---|---|
| Enable Registration | Turn on so members can sign up for the event |
| Capacity | Maximum registrants. Leave blank for unlimited. |
| Registration Opens | Date and time when sign-ups become available |
| Registration Closes | Date and time when sign-ups close (optional) |
Set Enable Registration to on. Enter a Capacity if your venue or session has a limit; otherwise leave it blank.
Step 4: Set Event Pricing
Under Pricing, choose whether the event is free or paid.
Free event
Select Free. Members register at no cost. No Stripe connection is required.
Paid event
Select Paid and enter the price in dollars.
When members complete registration for a paid event, they receive a payment confirmation by email. Their payment receipt is available under My Registrations in their member account.
Note: Use the Free option for $0 events rather than entering a price of $0.00. This keeps the registration flow simple and avoids unnecessary Stripe processing.
Step 5: Publish the Event
- Once all settings are filled in, click Publish Event.
The event is now live on your co-op site. Members can see it on the public Events page and register from there.
Tip: To save your work and return later without making the event visible to members, click Save Draft instead. Drafts appear only in the admin panel.
Step 6: Member Registration Experience
Here is what a member sees when they visit your Events page.
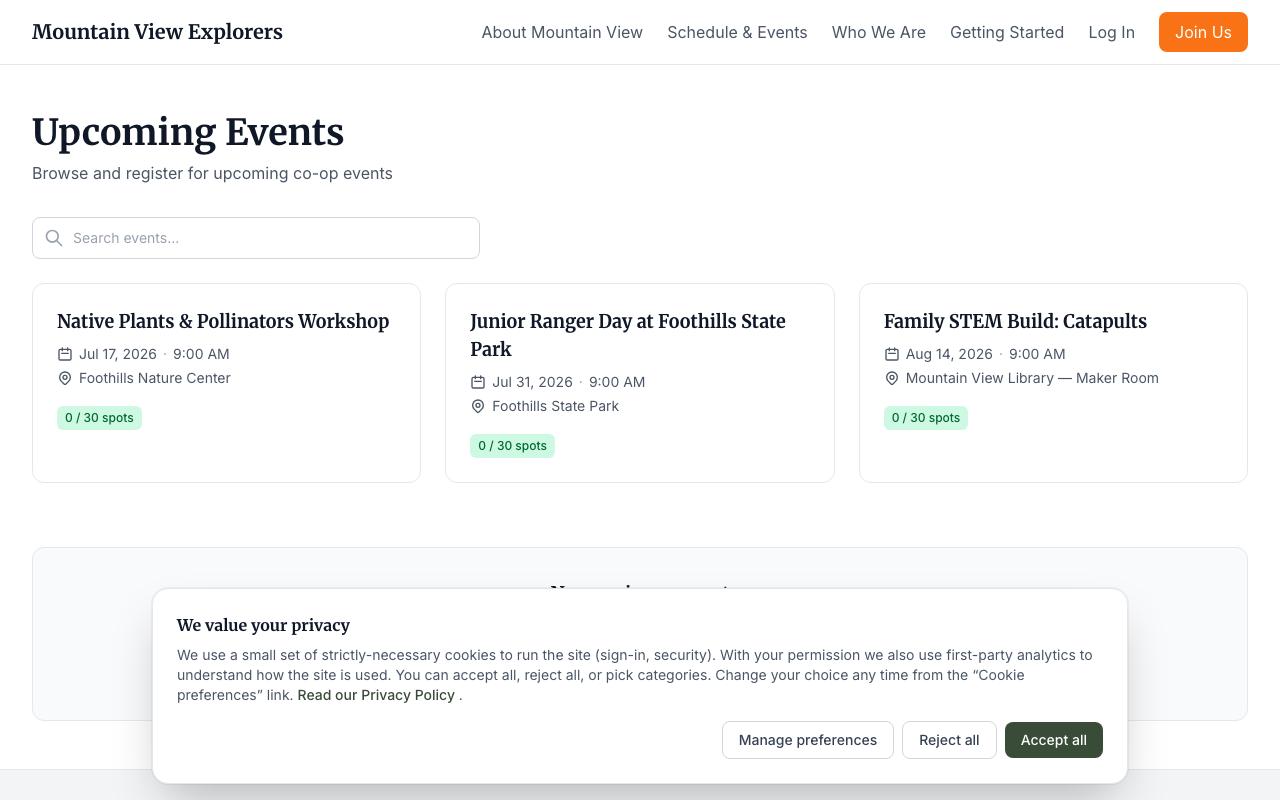
- The member clicks the event title or a Register button.
- The event detail page shows the date, time, location, and description.
- For free events, the member clicks Register.
For paid events, the member clicks Register & Pay and enters payment details on a secure Stripe checkout page. - After completing registration, the member receives a payment confirmation by email and can view their spot under My Registrations.
Next Steps
- To view who has registered and track attendance, see How to Manage Registrations and Track Attendance.
- To contact registered members, see How to Send Newsletters and Announcements.